
John is a member of the NestJS core team, primarily contributing to the documentation.
This is the first in a multi-part series on building re-usable npm packages for NestJS. This article focuses on the mechanics of the process:
- building a simple npm package
- consuming and testing it locally in a NestJS app
- publishing it to NPM
This article lays the foundation for future articles in this series, which delve into more complex NestJS packages.
Intro
We all interact with the npm registry on a daily basis. Usually the registry itself, and how it works, are conveniently relegated to the background - we don't have to think about the details when we run npm install. But sometimes we need to work with the registry more directly - perhaps we're publishing a core infrastructure/utility package for private use across teams within an organization, or maybe we're releasing an open source package for public use.
Publishing a package for the first time, then seeing it install with npm install is pretty fun.
And it's surprisingly easy. While there are plenty of general npm tutorials out there, I've created this tutorial, along with a package starter repository that you can quickly clone to set things up in a standard way, and skip past some of the little hurdles. While there really isn't anything Nest-specific about this, TypeScript can introduce a wrinkle or two not typically covered in other npm tutorials. And combined with the the NestJS environment, you can enjoy a productive iterative development/deployment workflow if you follow a few basic steps. That's what I'll cover here. Follow along, and you should be able to publish a basic NestJS package in about 15 minutes.
As to why you want to do this, I can think of at least two great reasons:
1) Learning how to publish a package demystifies one of the things we tend to take for granted. It probably ought to be on the resume of any self-respecting full stack developer. 😃
2) Whether you publish to the npmjs.com registry, or a private one, publishing an npm package is the standard way of creating and sharing re-usable packages.
Again, while the sample package we'll build in this tutorial is trivial, this article lays the foundation for several more articles that will go into detail on much more sophisticated modules. Stay tuned!
Pre-requisites
If you plan to follow the steps in this article, make sure you have an account at www.npmjs.com (you can use a free one for this exercise, and indeed, unless you want to publish private packages, you can stick with a free account). You could also publish to a private npm registry like verdaccio, but setting that up is beyond the scope of this article.
Setting up for development
If you're live-coding along with reading this article, I have a couple of brief recommendations.
First, note that we'll actually be working on two separate but related bits of code. One for the npm package, and one for a companion NestJS app that will consume and exercise the package.
I recommend sticking with the names used below to keep things properly synchronized. If you're building your own real package with its own unique name, just make sure to synchronize the name you choose across the various places it occurs (folders, package.json, npmjs, git, etc.).
Next, I recommend you open two command line windows (as well as two editing sessions) to work on both bits of code simultaneously. This will help you get the feel of a useful development pattern for building a package in an iterative fashion. The rest of this tutorial will refer to these two command line windows. If you prefer to work in a single command line window, just pay careful attention to what folder you're in as you execute each step!
Setting up the folders
In terminal window 1, create a new folder. This will be the parent folder for both parts of the project: the package we're building, and our small companion NestJS app.
mkdir nestmod && cd nestmod
Clone the module starter repo
In terminal window 1, start by cloning the nestjs-package-starter repo. This is a starter repo that sets up a lot of the default details for your NestJS related npm package. These details can be a bit tedious to get right.
git clone https://github.com/nestjsplus/nestjs-package-starter.git
Once completed, this step should result in a brand new package template in the nestjs-package-starter sub-folder.
Now install its dependencies. Still in terminal window 1:
cd nestjs-package-starter
npm install
Create the test app
In your second terminal window, make sure you start out in the top level folder you created (I created nestmod above so that's what I would use; use whatever folder you created to follow along with the tutorial). Scaffold the small NestJS app we'll be using to exercise our package.
nest new test-app
Choose your preferred package manager (npm or yarn), and wait a moment while the Nest CLI builds your starter app.
Your folder structure should look similar to this now:
nestmod
└─── nestjs-package-starter
│   └───node_modules
│   └───src
│   ...
└─── test-app
│   └───node_modules
│   └───src
│   ...
Build the package
Take a moment to poke around in the nestjs-package-starter folder. Here are a few things to notice:
1) The src folder has two files:
-
test.tsis the entire functionality of our package; it exports one simple test function we'll import into our Nest test-app to prove to ourselves that we've actually installed and are using the package. -
index.tsexports thetest.tsfunction from the folder (it's a barrel file).
2) The package.json file has a number of interesting parts. We'll delve into several of these throughout the tutorial. One to notice now is the different types of package dependencies that are apparent:
- regular
dependenciesare those required to run our code; these should be anything in addition to, but not including NestJS itself. For example, if we were using thedotenvpackage in our code, this is something that is not provided by NestJS itself, so it would belong independencies. -
peerDependencies: since this is a NestJS-based package, we use this section to declare that it is compatible with Nest version 6 (a minimum of 6.0.0). This means we assume that the person using the package has a compatible NestJS environment that we can rely on. Mentioning just the@nestjs/commonpackage is sufficient for this purpose. Specifying a version of^6.0.0gives us broad compatibility with any minor versions of NestJS the user may have installed. -
devDependencies: these are the packages we need only for development; since we expect to build a Nest-based package, we need Nest in our development environment, along with testing utilities, TypeScript, etc. These dev dependencies should be pretty much identical to the regulardevDependenciesyou have when building a normal Nest app. For example, compare these to thedevDependenciesentry in thetest-appand they should be identical.
In terminal window 1, make sure you're still in the folder where you cloned the nestjs-package-starter, and build the package with:
npm run build
The npm build script is trivially simple: it just runs the TypeScript compiler in the folder configured as the rootDir in our tsconfig.json file. Speaking of which, let's take a quick look at tsconfig.json, which kind of "teams up" with package.json to control how our package is built.
The most notable things in the tsconfig.json file are:
-
declaration: trueensures that our type files are generated, which helps consumers of the package benefit from TypeScript type checking and editor features like intellisense. - the two
Decoratorsflags ensure that TypeScript decorators work properly. -
outDircontrols where our compiled code is published. -
rootdir, along with the top-levelincludeandexcludeentries, control which source code is compiled.
Take another quick peek at package.json, and note the "main": "dist/test.js" entry. This is the last piece of the "packaging puzzle". The build script compiles our TypeScript into JavaScript in the dist folder; the barrel file (index.ts) ensures that our function is exported and publicly visible; the "main" entry in our package.json tells the module loader where to discover the exported symbols from our package when it's imported.
So we've now compiled the TypeScript and prepared it for deployment in a package.
Install the package into the test app
You now have a full-fledged npm package, though it's only available locally. You can use the package in test-app with a familiar-looking npm command.
In terminal window 2, change to the folder created by the nest new test-app command, where our test app lives.
cd nestmod/test-app
Use npm to install the package we just built into our test app.
npm install ../nestjs-package-starter
The main difference from a normal npm install, I'm sure you've noticed, is that you are referring to a combination of a path (the .. part) and a name (the nestjs-package-starter part), rather than the typical usage (when pulling from the npmjs.com registry) which uses just a package name. This illustrates the simple process enabled by npm for developing packages: npm install works exactly the same for local packages as it does for remote packages downloaded from npmjs.com. You can see this clearly by noticing that in testapp/package.json, there's an entry like:
"@nestjsplus/nestjs-package-starter": "file:../nestjs-package-starter"
Use the package in the test app
The template package exports a single simple test function. Examine nestjs-package-starter/src/test.ts to see it:
// nestjs-package-starter/src/test.ts
export function getHello(): string {
  return 'Hello from the new package!';
}
Now that you've installed the new package in test-app, it's available like any npm package, and you can use it in the normal fashion. Open test-app/src/app.controller.ts and import the function; make sure the file looks like this:
// test-app/src/app.controller.ts
import { Controller, Get } from '@nestjs/common';
import { getHello } from '@nestjsplus/nestjs-package-starter';

@Controller()
export class AppController {
  @Get()
  getHello(): string {
    return getHello();
  }
}
In terminal window 2, start test-app (using start:dev is recommended here so we can make iterative changes):
npm run start:dev
In a browser, head on over to http://localhost:3000 and see the message coming from the imported package function.
If you've followed along so far, let's do one more thing that shows how easy it is to continue to iterate. Make a simple change to the getHello() function exported by the package (I like to change it to return 'Buon Giorno!' 😄).
Now, make sure the test app is still running in dev mode (e.g., npm run start:dev) in terminal window 2, then, in terminal window 1, rebuild the package with:
npm run build
Notice that in terminal window 2, since we're linked to the local package, the dev server will automatically restart as the package is rebuilt (it may show errors for a few seconds while the process completes). This highlights a key thing to keep in mind: whenever you make local changes to the package, you must rebuild it before it's visible to consumers of the package. Obviously this means you must rebuild before you publish it.
To make sure this last bit happens, take another look at the package.json file. The prepare script is a special script recognized by the npm publish command. Whenever you publish (which we'll do in a moment), the prepare script will be run before publishing. Note that there are several other such npm "hooks" available that will let you do things like run lint, check in/tag source code to your git repo, etc. See here for details.
When you refresh your page at localhost:3000, you should see your nice warm Italian greeting!
Publish the package
We're now ready to push our newborn package out of the nest and onto the 'net (ugghh, sorry for the bad pun). To complete this step, you'll need a free account at www.npmjs.com. If you don't have one, go to the signup page to get one.
Give the package a unique scoped name for npm
A few notes about npm
npm names
All npm packages have a name. If the name starts with@, it's a scoped name. Scoped names are useful to create a unique namespace for your packages. If you and I both publishnestjs-package-starterto npmjs.org, there will be a collision. Whoever publishes first owns the name. But if I publish a scoped package name, such as@johnbiundo/nestjs-package-starter, you can publish your own copy at@yournpmjsname/nestjs-package-starter, and they both happily co-exist. Anyone that wants mine will donpm install @johnbiundo/nestjs-package-starter, and anyone that wants yours will donpm install @yournpmjsname/nestjs-package-starter. Read more about scopes here.npm public packages
npm lets you publish packages for free as long as they're public. If you want to publish private packages (say for sharing only within your company), you'll need a private account. Alternatively, you can set up an internal private registry with a registry server like verdaccio.npm orgs
In addition to publishing packages scoped under your name, you can create a free npm org to give your packages a more custom name (scope). For example, I publish several packages under the org@nestjsplus. Read more about npm orgs here.
Once you're ready, open the package.json file for the package and change the following entries:
-
name: your scoped package name, something like
@mynpmjsname/my-new-package. -
version: choose a starting version number; I comment a bit more about this below, but something like
1.0.0will work fine for now. -
author: your name and email, in a format like
John Biundo <john@email.com>.
Later, you'll want to customize other things like the description, license, keywords, repository links, etc. None of those are very TypeScript or NestJS-specific, so we won't cover them here, but a little Googling will turn up lots of good articles and help for them.
Once ready, publish the package
Note: Each time you re-publish the package, you'll have to change the version field in package.json (or the publish step will fail). It's best practice to use semantic versioning ("semver") for npm packages.
In terminal window 1, run:
npm publish
The output of this step shows you exactly what files are bundled up and sent to npmjs.org to create your package, as well as the version number and some other metadata.
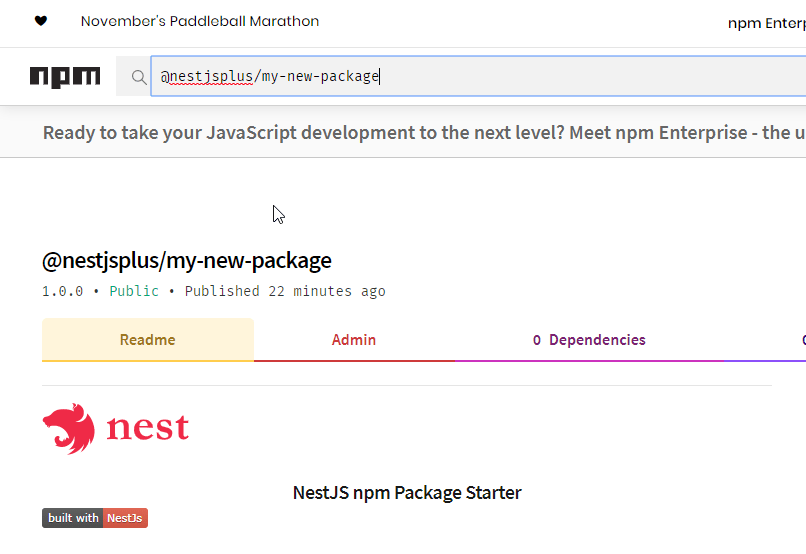
Search for your package on www.npmjs.com
Head on over to https://www.npmjs.org, and search for your package.
Install the published npm package in your test app
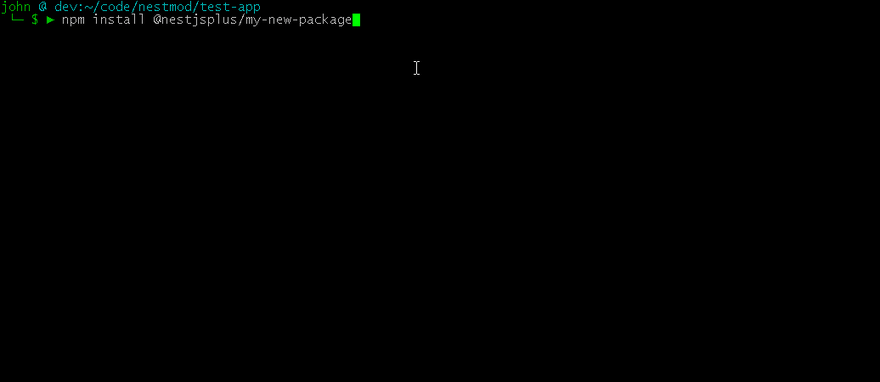
Now that the package is live on npm, you can install it as you would any package.
In terminal window 2, first, uninstall the local one we created and installed about 10 minutes ago.
npm uninstall @nestjsplus/nestjs-package-starter
Now, install your shiny new npm package from the internet. Change the names as appropriate below:
npm install @yournpmjsname/your-package
Finally, edit your test app to reflect the new npm package name (paying attention to using the correct "scoped" name if you published that way). For example:
// src/app.controller.ts
import { Controller, Get } from '@nestjs/common';
import { getHello } from '@yournpmjsname/your-new-package';

@Controller()
export class AppController {
  @Get()
  getHello(): string {
    return getHello();
  }
}
Fire up the app, and you'll be using your new package!
Now that you know how easy it is to publish an npm package, stay tuned for the next articles in this series where we'll cover building more interesting NestJS modules.
Feel free to ask questions, make comments or suggestions, or just say hello in the comments below. And join us at Discord for more happy discussions about NestJS. I post there as Y Prospect.


