We recently released a new way to use Stripe Payment Links on your website. You can now easily turn them into customizable embedded buttons using the Dashboard, generating a custom piece of code that you can add to your codebase so you can sell your products online with minimal effort.
Creating the Buy button
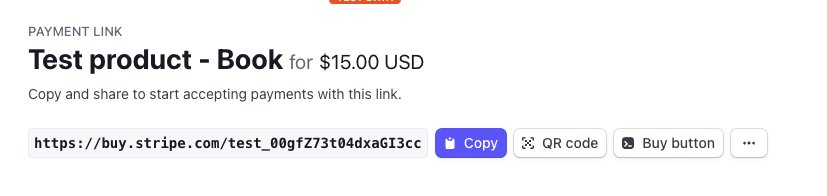
In the Stripe Dashboard, select a product you have generated a Payment Link for. Under the Pricing section, click on the “View payment link” button to be redirected to the details page.

You’ll then click on “Buy button,” which is located to the right of the payment link.
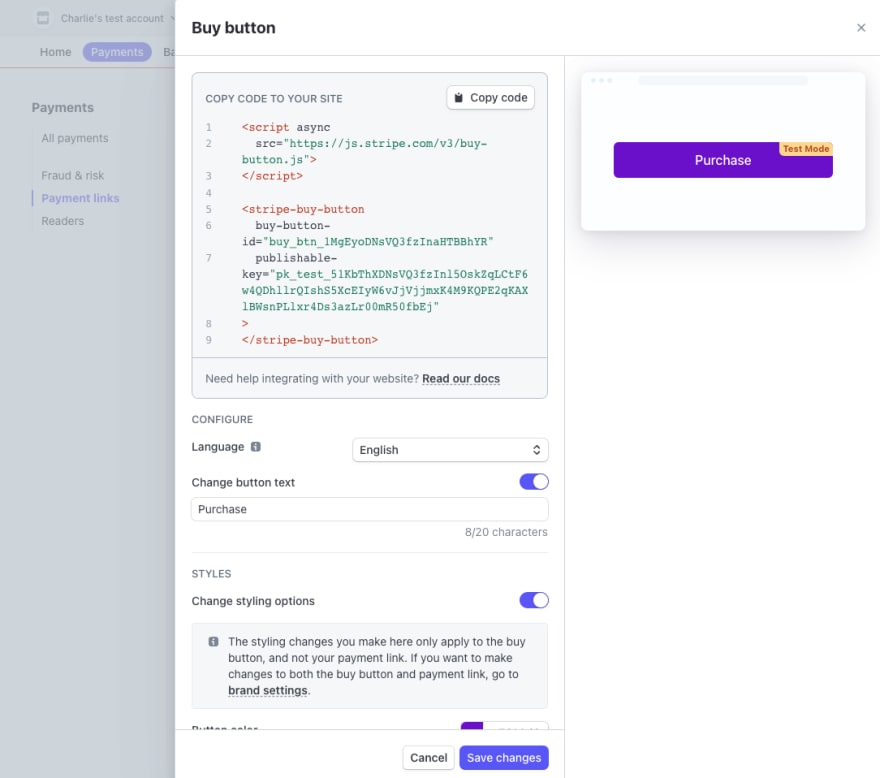
A panel will appear on the right to let you customize your button’s appearance and content.
Embedding the button
When your button is ready, copy the code sample provided and paste it into the part of your codebase responsible for rendering the UI where you’d like the button to be displayed.
You will notice that the button is made of a script tag that imports a JavaScript library dedicated to handling how these buttons work, in addition to a custom <stripe-buy-button> tag with a button ID and your publishable key as attributes.
<script async src="https://js.stripe.com/v3/buy-button.js"></script>
<stripe-buy-button
 buy-button-id="buy_btn_1MgEyoDNsVQ3fzInaHTBBhYR"
 publishable-key="pk_test_51ABC" // replace with your publishable key
>
</stripe-buy-button>
The code sample above works well to display a button that sells a single product. However, if you want to use a Buy button for multiple products and your UI is built using a component-based front-end framework such as React, you will have to adapt this code sample to be more dynamic.
For example, if you are rendering a list of your products and you want to display a Buy button for each product using a reusable custom component, you could adapt the code sample to something like this:
export default function App() {
// The list of your Buy button IDs
 const buttonIds = [
   "buy_btn_123ABC",
   "buy_btn_234DEF",
   "buy_btn_567GHI"
 ]
// The component to display the button that receives a single button ID as parameter
 const BuyButtonComponent = (buttonId) => {
   return (
     <stripe-buy-button
       buy-button-id={buttonId}
  publishable-key="pk_test_51ABC" // replace with your publishable key
     >
     </stripe-buy-button>
   );
 }
// Loop through the IDs and display a button for each product
 return (
   <>
   {buttonIds.map(b => BuyButtonComponent(b))}
   </>
 );
}
If you are building your website using this component-based approach, you will need to add the script tag separately in the head tag of your main HTML file.
That’s it. No additional change is necessary to start using this feature.
Conclusion
Using Buy buttons can simplify the implementation of Stripe Payment Links into your website by providing a short auto-generated code sample that you can copy and paste into your codebase and display buttons that are customized to your brand’s look and feel.
We hope you’ll share how you’re planning to use them.
You can also follow Stripe developer updates on the following platforms:
📣 Follow @StripeDev and our team on Twitter
📺 Subscribe to our YouTube channel
💬 Join the official Discord server
📧 Sign up for the Dev Digest
About the author

Charlie Gerard is a developer advocate at Stripe, a published author and a creative technologist. She loves researching and experimenting with technologies. When she’s not coding, she enjoys spending time outdoors, reading, and setting random challenges for herself.